|
Decluttering and getting organized is one of those tasks that's often easier said than done. Even with the best intentions, many people find themselves repeatedly stalling out, unable to make sustainable progress in their homes. As a professional home organizer, I've worked with countless overwhelmed families to help them overcome the mental and physical barriers to decluttering. Through this experience, five key roadblocks have consistently emerged as the main culprits holding people back.  Obstacle #1: Lack of Time ⏰ Between work, family responsibilities, social commitments, and the general busyness of daily life, many people feel they simply don't have the time to tackle a big decluttering project. It often gets pushed aside in favor of more "urgent" tasks. Recommendations to overcome this obstacle 1) Start small: Set aside just 10 minutes, at least 3 days a week. Put it in your calendar and treat it like any other important task or appointment. Even this small amount of time can lead to steady progress. 2) Make it easy: Begin your decluttering efforts with a junk drawer or one box of decorations from the attic. Once you start feeling successful, you'll build the confidence to tackle larger, more daunting areas of your home. 3) Choose your most productive time: Are you a "morning person" or do you get an energy boost in the afternoons or evenings? Schedule your 10-minute sessions during the time when you're most likely to be focused and motivated. 4) Declutter during downtimes: Use commercial breaks while watching TV as opportunities to quickly sort through and let go of items. 5) Use a timer and set a goal: Each time you declutter, set a timer for 10 minutes and challenge yourself to remove a specific number of items (e.g., 10 items). This "beat the clock" approach can help you stay focused and make the most of your limited time. The key is to start small, make it easy on yourself, and be consistent. Over time, those 10-minute sessions will add up, and you'll start to see progress in your decluttering efforts. Obstacle #2: Emotional Attachment 💖 The hardest items to let go of are often those with strong sentimental value. Whether it's your child's first pair of shoes, Grandma's vintage china, or a box of old love letters, the emotional weight of these possessions can make decluttering feel downright impossible. Recommendations to overcome this obstacle 1) Reflect: Ask yourself, "Does this item truly bring me joy, or am I just feeling guilty about letting it go?" If it's the latter, express gratitude for the memories and then let the item go. 2) Preserve the sentiment: Take a photo of the item to preserve the memory. Remind yourself that the memories you cherish live on, even if the physical object does not. 3) Compromise with 3 favorites: If the idea of an "all or nothing" approach is a barrier, allow yourself to keep only your 3 most meaningful or joyful items. Place the rest in a labeled storage bin. If you don't need or miss those items in a year, you'll feel more confident about letting them go. 4) Assign new meaning: Consider repurposing the item or finding a new way to display or use it. This can help create a positive association and make it easier to part with. 5) Share the memories: If letting go feels too difficult, consider passing the item on to a family member or friend who would appreciate it and the story behind it. The key is to approach each sentimental item with care, empathy, and an open mind. By taking a thoughtful, step-by-step approach, you can overcome the emotional attachment and make progress in your decluttering journey.  Obstacle #3: Overwhelm and Indecision 🤷♀️ For many, the idea of tackling a big, daunting decluttering project is so overwhelming that they never even start. The fear of making the "wrong" decisions or not being able to do it "perfectly" can be crippling, leading to analysis paralysis and inaction. Recommendations to overcome this obstacle 1) Start small and build confidence: Begin your decluttering efforts with a manageable task, such as a junk drawer or one box of decorations. As you experience the satisfaction of completing these smaller projects, you'll build the confidence to tackle larger, more daunting areas of your home. 2) Use a decision-making framework: Ask yourself the following questions to help guide your decluttering decisions: a. Do I use this item regularly? No = let it go! b. Is it broken or outdated? Yes = let it go! c. Is it easily replaceable? Yes = let it go! 3) Consider sharing with family: If you're struggling to part with an item, see if a family member or friend would be willing to take it. If no one else wants it, that's a strong indication that it's time to let it go. 4) Embrace the "good enough" mindset: Perfection is the enemy of progress when it comes to decluttering. Remind yourself that your goal is to make steady, incremental improvements, not to achieve a flawless, magazine-worthy result. 5) Take it one step at a time: Break down your decluttering project into smaller, manageable tasks. Focus on completing one area or category at a time, rather than trying to tackle your entire home all at once. By adopting a more gradual, compassionate approach to decision-making, you can overcome the feelings of overwhelm and indecision that often hold people back from making progress on their decluttering goals. Obstacle #4: Lack of Family Support 👨👩👦 Decluttering is often a team effort, but not everyone in the household may be on board. Spouses, kids, or other family members who aren't invested in the process can inadvertently sabotage your efforts, whether consciously or subconsciously. Recommendations to overcome this obstacle 1) Communicate openly and without judgment: Have an honest, compassionate conversation with your loved ones about your decluttering goals and why it's important to you. Listen to their concerns and perspectives as well. 2) Make it a family activity: Enlist your family's help by turning the decluttering process into a collaborative, fun experience. Compromise where needed, and celebrate small wins together. Decluttering is much easier (and more enjoyable) when you have the support of your loved ones. 3) Set a shared family goal: Identify a decluttering-related objective that the entire household can work towards, such as clearing out a specific room or creating more storage space. Celebrate reaching this goal as a family, acknowledging everyone's contributions. 4) Lead by example: As you make progress in your own decluttering efforts, your family members may gradually become more receptive to the idea. Showcase the benefits you're experiencing, such as increased productivity, reduced stress, or a greater sense of calm in your home. 5) Suggest a trial run: Propose a temporary, limited-time decluttering challenge that your family can participate in together. This can help them experience the positive impacts firsthand and build momentum for more long-term efforts. By fostering open communication, shared goals, and a spirit of collaboration, you can overcome the hurdle of lacking family support and make the decluttering process a united, rewarding experience for everyone involved.  Obstacle #5: Bad Habits 🧠 Even with the time, motivation, and family support to declutter, deeply ingrained bad habits around acquiring and maintaining stuff can quickly derail your progress. Impulse purchases, sentimental hoarding, and dropping items anywhere instead of putting them away can undermine all your hard work. Recommendations to overcome this obstacle 1) Identify your problem areas: Take a close look at your specific decluttering-related bad habits, such as impulse shopping, failing to put items back in their designated homes, or holding onto things out of sentimental attachment. Understanding the root causes of these behaviors is the first step. 2) Implement systems and routines: Once you've identified your problem areas, put in place practical solutions to address them. For example, institute a 24-hour "cooling off" period before making non-essential purchases, or create designated storage spaces for commonly used items and make tidying up a part of your daily or weekly rituals. 3) Start small and build momentum: Don't try to overhaul all your bad habits at once. Focus on making one or two changes at a time, and celebrate your successes. As you experience the benefits of these new habits, you'll be motivated to tackle additional areas. 4) Enlist accountability partners: Ask your spouse, family members, or friends to support you in breaking your decluttering-related bad habits. Having someone to regularly check in with and provide encouragement can make a significant difference. 5) Be patient and compassionate with yourself: Changing deeply ingrained habits takes time and effort. If you slip up, don't beat yourself up. Approach it with self-compassion, learn from the experience, and recommit to your goals. Consistency and a step-by-step approach are key to overcoming the roadblock of bad habits. By implementing practical systems and routines, you can gradually replace undesirable behaviors with more positive, decluttering-friendly habits. ✨ Don't forget!! - Grab This FREE Guide ✨ Your Handy Companion for Overcoming the 5 Biggest Decluttering Obstacles Alright, friends, we've covered a lot of ground when it comes to the most common roadblocks to decluttering. But don't worry - with the right mindset and strategies, you've got this! Remember, overcoming these obstacles is all about taking it one step at a time. Start small, celebrate your wins, and don't be afraid to revisit and refine your decisions as you go. Progress, not perfection, is the name of the game here. The most important thing is to just get started. Identify the specific challenges holding you back, try out the solutions we discussed, and watch as your decluttering journey starts to unfold. Before you know it, you'll be well on your way to the calm, organized home of your dreams. So what are you waiting for, my friends? Grab a box, set a timer, and dive right in. I know you can do it!!
0 Comments
Hey there, my fellow decluttering friends! If you are reading this blog post, you are either struggling to get started decluttering or are looking for some ideas on how to make the process easier. Either way, this post is for you!
As a professional organizer, I've helped many families just like yours finally gain control over the clutter and chaos in their homes. The good news is, there's a proven, step-by-step process that makes decluttering feel manageable and, dare I say, even enjoyable! With the right approach, you can declutter any area of your home - from the junk drawer to the overflowing closet - and keep it that way for good. So, let me walk you through it. 
1. Assess and Set a Goal
First things first, let's start by assessing the space you want to declutter. This can be the smallest space to start, the point is you pick a space and you tackle that space with everything you’ve got! Take a good look around and get crystal clear on the current state of the clutter. How much stuff are we talking about here? What categories of items are taking up the most space? This assessment will help you understand the scope of the project and prepare accordingly. Next, it's time to set your intention. Before you start pulling everything out, get clear on your "why" - why do you want to declutter this space? How will your life improve once it's organized? Maybe it's about reclaiming your kitchen counter for actual cooking, or creating a serene oasis in your bedroom. Whatever your reason, keeping this intention in mind will give you the motivation to power through the process, even when things get a little tough.
2. Prepare
Now, let's make sure you have the right supplies on hand to tackle this decluttering project. You'll want to gather things like:
When you’re ready to proceed with Step 3, make sure you have these items laid out so they are easy to grab when you need them. Start with at least 4 Storage containers laid out side by side.
3. Remove Every Item
Alright, now for the big step - empty it out! Yep, that's right, it's time to completely remove every single item from the space. I know, I know, it might feel a bit daunting, but trust me, it's a crucial step. Seeing the empty space will give you a beautiful blank canvas to work with, and it will make the sorting process so much easier.
4. Sort & Categorize
As you are removing items, take a moment to sort and categorize. Go through each item and decide which category it belongs to:
When you have finished this step, go ahead and take all the items that are not KEEP to the garage or even place in your car! This will clear your working space for the last step as well as keep you from digging back into the bags & boxes for items you decided to let go. 
5. Place items
Once you've sorted everything, it's time to start putting the "keep" items back into the space, but this time, you're going to assign each category a designated storage solution or home. This will help ensure the area stays clutter-free and easy to maintain. Once you've sorted everything, it's time to start putting the "keep" items back into the space. As you place the items, here are a few tips:
Place items in a location that makes sense and will be easy to find later.
6. Maintain
The final step is to maintain the system. Schedule regular check-ins, whether it's 15 minutes a week or an hour a month, to tidy up, donate anything new that doesn't fit, and ensure everything has a proper home. Trust me, this step is key to keeping your newly decluttered space looking and feeling its best. The final step is to maintain the system:
Tip: Adopt a 1-in-1-out approach: for every new item purchased, remove 1 similar item. If space is tight, try 1-in-2-out until the quantity is right.
That’s the process, friends!
Follow these steps and reclaim your space and regain control over the clutter for good:
Let's get started!
It seems like just yesterday we were talking about setting goals for the New Year and now it's almost June! Soon the kids will be done with the school year and the craziness of summer will begin!
Now is the perfect time to check in on how you are progressing with your organization goals for the year. Perhaps you've hit a few roadblocks this year that have distracted you from your goals.
Guess what? I have too! You are not alone! Guess what else? Here's the best part - you can restart your progress toward your goals anytime you want. These are your goals, not anyone else's. That means you're in full control and can pick things back up whenever you're ready. Isn't that great? You know, I've actually found through my own experience that the best way to reset your goals is by first working on shifting any negative mindsets you might have. Then, it's really important to take the time to develop a solid, actionable plan. It makes a big difference, trust me. 
I've got the perfect plan to help you RESET your organizing goals and get that motivation back on track. This is your chance to reignite that spark and make serious progress. Trust me, following these steps is going to make all the difference.
Reflect
Okay, let's pause for a moment before we dive into the details. I want you to reflect on the deeper reasons behind your goal of an organized home. What's really driving you to make this change? Is it just about saving time searching for lost items? Or is there something more - maybe a desire to create a welcoming, stress-free haven where you're excited to host guests? Perhaps this is about breaking a cycle of disorganization from your upbringing. Whatever your personal motivations are, I encourage you to connect with that deeper sense of purpose. Let those meaningful reasons fuel your motivation and keep you moving forward, even when the organizing process feels challenging. This isn't just about tidying up - it's about creating the home environment that will truly support and nurture you. Keep that vision front and center as we move forward. Take a few moments to think about this and write down your "why".
Excellent, let's take a moment to reflect on your previous organizing efforts and identify what worked well and what didn't. Consider these key areas:
Take some time to jot down your thoughts on each of these areas. This self-reflection will be invaluable as we reset your organizing goals and create a plan that sets you up for success. 
Evaluate
Excellent, let's dive into evaluating your current situation honestly. This will be crucial for setting you up for success. First, let's take a clear-eyed look at the level of work needed.
Now, let's recognize some key challenges:
By taking this thorough, honest look at your current situation, you can set more achievable goals, anticipate potential roadblocks, and develop a realistic plan to successfully organize your home. This assessment lays the critical groundwork for the next steps.
Strategize
Now, we pull it all together and strategize your plan of action based on your reflection and evaluation. First, let's prioritize the areas of focus:
Next, let's develop effective storage solutions:
Finally, let's create a detailed plan:
Execute
Excellent, now let's dive into the critical step of putting your plan into action! Here's a concise overview: Schedule Regular Time:
Assign Tasks to Household Members:
Prepare Necessary Supplies:
Utilize the Timer Technique:
Enlist an Accountability Partner:
Review and Reflect:
Consistent implementation of your well-planned strategy, with support from your household and accountability partner, will be crucial for turning your home organization goals into a reality.
Track
Now that you have your plan of action, let's cover the important step of of goal achievement by tracking success by celebrating small wins and documenting your progress: Mark Tasks Off Your List:
Maintain Momentum with Small Wins:
Document the Finished Product:
Use the Photos for Motivation:
Consciously marking off completed tasks, celebrating small wins, and documenting your progress through photography can help sustain your motivation and ensure the long-term success of your home organization efforts. These strategies keep you encouraged and accountable throughout the journey.
Putting it together - The Perfect Plan to RESET your organization goals.
Excellent, let's summarize the key steps you've taken to position yourself for lasting home organization success: Reflect, Evaluate, Strategize, Execute, and Track - you've methodically worked through this comprehensive process. Remember, this isn't about perfection, but progress and self-compassion. Embrace the challenges, celebrate the small wins, and be patient with yourself. Your home is a reflection of your well-being, and investing in an organized, peaceful living space is an investment in your overall quality of life. Trust the plan you developed, lean on your support system, and trust the process. With each completed task and reorganized area, you're reclaiming your space and cultivating an environment that empowers you to thrive. Stay encouraged, keep moving forward, and know that you have the resilience and determination to transform your home into a sanctuary that uplifts your spirit and nourishes your soul. This is your time to create the harmonious, organized living space you deserve. I'm cheering you on every step of the way! 
Are you feeling overwhelmed by the physical clutter in your home?
Do you dream of reclaiming your space and living in a more organized environment? 
As a professional organizer, I understand the challenges that come with tackling clutter, but I'm here to tell you that it's possible to make a change, one small step at a time.
When faced with a cluttered home, it's easy to feel like the task of decluttering is insurmountable. However, I'm here to encourage you to start small. Instead of trying to tackle the entire house in one go, focus on decluttering just a little bit each day. By breaking the task into manageable chunks, you can make progress without feeling overwhelmed.
Here are a few reasons why starting to declutter a little each day can make a big difference:
1) Reduce Overwhelm: Instead of facing the daunting task of decluttering the entire house at once, focusing on a small area each day can help to reduce feelings of overwhelm.
2) Build Momentum: Taking small steps each day helps to build momentum. As you see progress in small areas of your home, you'll feel motivated to continue decluttering.
3) Create Consistent Habits: By incorporating decluttering into your daily routine, you can establish consistent habits that will gradually transform your home.
So, where should you start?
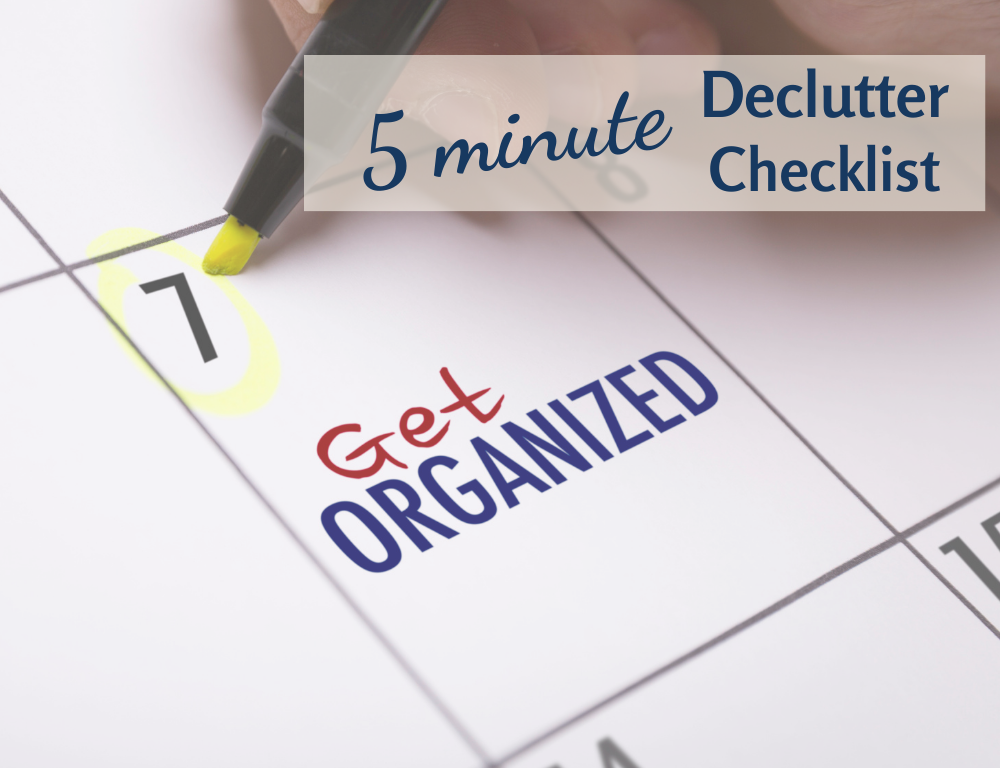
We have an exciting opportunity that leads you through 30 days of decluttering your home. Each day there is a task to be completed in just 5 minutes. You'd be amazed how much you can accomplish in 5 minutes when you are focused and ready!
Here's how you can follow the Spring Declutter Challenge:
* Connect on our Social Media pages linked below. We'll be posting each daily challenge on Facebook and Instagram. * Sign up to receive weekly emails using the link below. * You'll also receive a FREE 30 day calendar you can download to follow along during the challenge.
We'll be starting the Challenge on April 22, 2024, but you can start any day you choose!
As you make progress, you'll start to see the impact of your efforts, which can be incredibly motivating. By taking it one step at a time, you can create a home that feels more spacious, organized, and welcoming.
Here's to reclaiming your space and living a life you love, one decluttering day at a time!
If you're tired of feeling buried under a mountain of endless paperwork,
I've got your back! 
As a mom, I struggled with creating a system that worked for my family and kept us on track with bills, deadlines, invitations, and other commitments. Once I found a system that worked, it made all the difference!
Now, I help other families create a system that works for their home and is easy to follow and keep maintained!
Below are 6 tricks that create the most impact in staying on top of paperwork:
#1: Claim Your Space: First things first, carve out a specific spot in your home for all things paperwork. It could be a desk, a filing cabinet, or even just a dedicated drawer. Having a designated area will stop those pesky papers from taking over every nook and cranny. #2: Tackle Incoming Mail: Create a system for dealing with incoming mail. Sort through it as soon as it arrives, ditch the junk, and deal with the important stuff right away. #3: Schedule time: Set aside regular time slots to tackle your paperwork pile. Whether it's once a week or once a month, having a regular schedule will stop things from spiraling out of control. #4: Shred Away: Invest in a good shredder and say goodbye to unnecessary paper clutter. Shred anything you don't need to keep your personal info safe and your space clutter-free. #5: Go Digital: Embrace the digital age by scanning important documents and storing them safely on your computer. Not only does this clear up physical space, but it also gives you a backup in case something goes awry. #6: Create a filing system that's easy to stick to. Sort your documents into categories like bills, medical stuff, insurance, and personal files. Label your folders clearly so you can find what you need in a flash.
If you're ready to conquer paperwork and setup a system that works for you, check out this new FREE guide:
So there you have it - 6 tricks to whip your paperwork into shape and reclaim your sanity! And a FREE guide that will walk you thru the 4 parts to setting up your own paperwork system that works for you!
Remember, staying on top of paperwork is all about finding a framework that works for you and sticking to it! You've got this!!
Tax season is the worst, right? It's not just about dealing with our hard-earned money and figuring out what we get to keep, but also the hassle of gathering all those documents. It can really bring on some serious anxiety and dread, making us realize we need a better system for managing all this paperwork. (hint – more on that topic coming soon...)

Over the years, I’ve used several different systems when preparing for tax season. Now, after 30+ years of doing this, I have a system that seems to work well that I am sharing with you today. This system includes 6 easy steps and a checklist to guide the documents you need to gather.
Step 1: Schedule work session
Our biggest hurdle is to START. So right now, find 1-2 hours on your calendar in the next 5 days that you can devote to the task of gathering your tax documents. Then block your calendar for that hour. Keep it sacred, do not reschedule or forget. Step 2: Designate an area to work Gathering your documents may take room to spread out papers, so find yourself a clear surface that you will use in your scheduled time from Step 1. I have a folding table that I bring into our home office space to temporarily sort papers for tax season. When I’m done, it’s folded up and put away! Step 3: Create a filing system
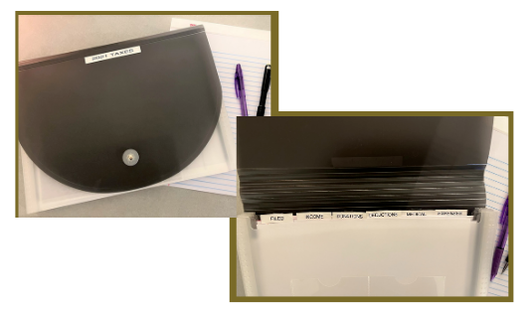
Step 4: Label tabs in filing system
Step 5: Checklist of Documents Needed
Step 6: Keep working to completion
You can do this!
You have a system and a checklist to guide your work. Take it one step at a time, and one category at a time and you'll get there!
Remember, your steps are:
Step 1: Schedule work session Step 2: Designate an Area to work Step 3: Create a filing system. Step 4: Label tabs in filing system Step 5: Checklist of Documents Needed Step 6: Keep working to completion
Don’t forget to download your free guide here:
Leave a comment to share what you like about this post!
*This details provided here are for informational purposes only and does not constitute legal, business, or tax advice. Each person should consult his or her own attorney, business advisor, or tax advisor with respect to matters referenced in this post.
7 steps to start the year right!
Another year, another resolution. This year let's make it happen!
Follow these 7 steps and you'll be off to a great start! 
1) Know your “why”
With any new habit or change you want to make in your life, it is important to understand why you want to make the change. I know it sounds simple, but many times we give up on what we are striving for because we forget why we wanted it in the first place. So, take a moment and think to yourself, why do I want to get organized this year? Maybe you want your home to be less stressful and more calm? Or perhaps you want to set a better example for your children? It could be as a simple as you sick & tired of wasting time trying to find things? Whatever it is, define your "why". Then say it to yourself, "I will get organized this year because… " Write it down, stick it to your mirror or refrigerator. Make it visible. Get fired up about it. Make it your goal that you will continue to strive for everyday! Then repeat it. Every time you see the visual, pause and say your why to yourself or even outloud! When you hit a point where you don’t want to put in the work, remind yourself of your why. Staying motivated is important to keep working when you want to give up. 2) Put away new gifts or purchases The first step to organizing is getting rid of what you don’t want or need. Given the holiday season has just passed, you and your family likely have several new items (clothes, toys, electronics, or even kitchen gadgets), take time to put away these items where they belong. As you are finding a place for the new items, select one item for each new item to be donated. One new toy means one old toy needs to be donated. One new pair of shoes means one old pair must go. If you really need to declutter, take away 2 or 3 items for each new item. Also, it's ok if the new gift is something you don't want to keep either. Add it to the donate pile! 3) Implement a shopping pause for non-essentials With all the new items in the house, it should be easy put yourself on shopping pause for a few weeks to start your resolution off right! If you need to make a purchase (emphasize NEED), first take the time to look around your house to make sure you don’t already have this item or a good substitute. Use what you have before you buy more. 4) Tackle the Hot Spots of your home. You likely have a few areas of your home where things collect. Kitchen countertop, area by front or back door, kitchen table, chair or the beloved treadmill. Make a new habit that each day you will clear these areas and put items that have collected in their correct place. Here are the most common items and suggestion for handling them.
5) Laundry. If you are behind on laundry, start a habit of completing at least one load per day until you are caught up. In doing so, your goal is to wash, dry, fold and put away all items in the load. As you are folding items, examine them to see if they should be donated or tossed if completely worn out. 6) Get the family to help. This is a big one, but you must have everyone in the family working together toward an organized home. Otherwise all your efforts will be destroyed within minutes! 7) Do small tasks every day. Even with 5 minutes a day, you can make a difference. Use this quick guide to help know what to tackle!
If you would like a free download of this checklist, you can submit your request here:
Keep working a little everyday and you WILL achieve your goal to
Get Organized this year! You've got this!
Hi Friends! Now that you have been working on developing and maintaining your Daily, Weekly and Monthly routines, I feel confident that you are starting to feeling some impact of your consistent effort. Have you noticed you have a little time at the end of each day to relax? Maybe your family has noticed your work and commented or even praised your efforts! Have your children started to follow the routines as well? Even if they haven't, take a few moments now and reflect. Pat yourself on the back! You will get there and they will notice.
Keep going! Stay the course! YOU CAN DO THIS!!
For reference, you can locate Part 1 - Daily Routines here, Part 2 - Weekly Routines here, and Part 3 - Monthly Routines here.
Let's continue getting more done in less time by
focusing on Yearly Routines! 
Step #1: Download the Yearly Planner Worksheet below.
Step #2: Refer to your TASK LIST from Part 1.
Step #3: Identify tasks flagged as QUARTERLY, YEARLY or OTHER. Assign tasks to a particular month of the year. - Some tasks are dependent on others (Taxes, Kids' School Holidays) - Most you will be able to decide which month to complete. - Make a note on how long the task typically takes you to complete. - Distribute the tasks throughout the year for months that work best with your schedule and other commitments. Tip! When scheduling your quarterly tasks, try to schedule every 3 months in the year. If there is flexibility in due dates, balance Quarterly and Other tasks with Yearly across months as Yearly may be less flexible.
Step #4: As you setup your calendar each month, add these tasks into the Monthly & Weekly schedules.
Step #5: Keep working on your routines. Continue to make adjustments to the Yearly Planner for this year and future years!
Let me know how your routines are coming along!! Leave comment below!
Hi Friends! Congratulations on developing and mmainting Daily and Weekly routines! I'm sure that you are feeling some impact of your work so take a moment now to reflect. Do you feel like you are more efficient in your tasks? Carving out a few minutes here and there? Are you starting to feel like you are more in control of your schedule? Keep up the great work and fine-tune where you see areas for improvement.
For reference, you can locate Part 1 - Daily Routines here, and Part 2 - Weekly Routines here.
Let's get started on Monthly Routines!
Step #1: Refer to your TASK LIST from Part 1 and review items you marked as MONTHLY.
Step #2: Download the Monthly Routine Worksheet below. (hint - there is a sample calendar included!) Step #3: Assign monthly tasks to a particular weeks of the month. - Some tasks are dependent on the days (Bank Reconciliation, Meetings or Social gatherings) - Most you will be able to decide which week to complete. - Make a note on how long the task typically takes you to complete. - Distribute the tasks throughout the month for weeks that work best with your schedule and other commitments.
Tip! Try to schedule your monthly tasks during the week so that you leave time during the weekend for fun and family!
Step #4: Keep track for several months. Check off every time you have completed monthly tasks.
Step #5: Keep working on your routines for the next several months. You should start to notice that you are doing the tasks without having to refer to the checklist.
Let me know how your routines are coming along!! Leave comment below!
Welcome Back!!
This post is a continuation from last week, so before you read any further, make sure you've read Part 1 here!
Now that you have your Tasks List started and have been working to practice your Daily Routines for a week or two, you are ready to add to your plan.
Let's get started!
Step #1: Refer to your TASK LIST from Part 1 and review items you marked as WEEKLY. Step #2: Download the Weekly Routine Worksheet below. (hint - there is a sample weekly list included!) Step #3: Assign weekly tasks to a particular day of the week. - Some tasks are decided for you, like trash/recycling pickup - Others you decide (Errand day, Cleaning day, Grocery shop day). The key is to distribute the tasks throughout the week on a day that works best with your schedule.
Tip! Try to schedule your weekly tasks during the week so you have weekend time for fun & family time!
Step #4: Keep track for 1 month. Check off every time you have completed the task for each day of the week.
Step #5: Keep working on your daily and weekly routines for the next several weeks. You should start to notice that you are doing the tasks without having to refer to the checklist.
Let me know how your routines are coming along!! Leave comment below!
It's Saturday morning. You are about to start doing a few chores. Then the phone rings, the kids need help, the animals need to be let out. Before you know it over 30 minutes are gone and you didn’t even have enough time to get out the vacuum! How is it that everyone gets the same 24 hours, but I can’t seem to get anything done?
Is there a way to STOP wasting time and energy making tasks harder than they need to be? How do I STOP re-creating the wheel every week?
The answer is to START building routines. 
I get it! You hear the word routine, you think boring or restrictive. But don’t poo-poo this concept so quickly. Keep reading!
Definition of routine: a regular way of doing things in a particular order. And yes, that does sound a little boring, but there is power in routines. As you build and practice your routines, you are programming your mind and body to do things in a particular order over & over to the point they become automatic. When your mind and body do things automatically, you are saving energy that you were using to think about doing these tasks. With that saved energy you start to become more efficient doing the tasks, which saves you precious time! With that time & energy you are saving by building routines, you may also start to notice other benefits like:
Are you on board and ready to start building your routines? Yes!!
START by setting aside 30 min to 1 hour of uninterrupted time to work on this exercise to outline your daily habits.
Step #1 – List out all the tasks you need to do regularly. Don’t just limit to think weekly daily, but also, monthly, yearly. I mean EVERY TASK. (You can download a template for this above!) Step #2 – Go thru the list and note how frequent task needs to be completed D = Daily W = Weekly M = Monthly Y = Yearly O = Other Step #3 – Think of your day in blocks of time that are minimum an hour. Designating a block of time to doing tasks allows for more tasks bundled together (or a routine!). Start with 3-4 blocks of time for routines
Step #4 – Use the Task List above and specifically the tasks identifed as DAILY and designate these tasks to be completed in one of the 4 routine blocks. Decide which time block works best for you and that task depending on the brain power or level of physical effort needed. (You can download a template below to help you get started)
When you assign a task to a time block, also assign a rough amount of time needed to complete the task. Step #5 – Keep track for 1 week.
You should start to notice that you are doing the tasks without having to refer to the checklist. As you are working to build routines it is a good idea to be CONSISTENT in your wake and sleep times every day of the week. This creates repetition and gets those routines to "stick" faster than if you have different schedules on your off days.
I'd love to hear about your thoughts, tricks and ideas of building your daily routines! Share below!!
Why am I the only one that cleans up after themselves?
I bet that if you are reading this, at some point you have asked yourself that question. Do you feel like you are fighting a battle when it comes to getting your family on-board with organization? Or maybe you get spirts of commitment but they are all to short lived. Maybe your spouse or partner is is the biggest challenge?
YOU ARE NOT ALONE! 
As a wife of almost 25 years that works full-time and has 2 "almost out of the nest" kids, I have tried LOTS of different tricks and tools over the years to keeping our house straight and clean (notice I did not write perfect or sanitized...). What I have found is that if you follow these 5 tips, give yourself and your family a little grace, then YOU can get more help from your family around the house!
#1: Be honest
Before you lay down the law of how everyone "must start helping more!" I suggest you take a different approach. Gather the family for either a family meeting or just in casual conversation at the dinner table. Be honest with them and speak on their level. "I need your help." Say these words, don't scream them. Look at them in the eye when you say it. I know using this tone and these words will get their attention. You see, we don't realize it, but our families see us as super-beings. We can do it all. It literally never even crosses their mind that you are struggling unless you tell them. It is important as a parent to show honesty and vulnerability. This tells our kids its ok not to be perfect and it's ok to say, "I need help." The next words are important. "We are ALL responsible for taking care of our home." When you don't do your part, it is more on me. When NO one does their part, it is ALL on me and I cannot keep doing everything. Now, I'll stop here to say, if your spouse/partner is the main culprit, then have this heart-to-heart discussion with them first. Once they are on board and supportive, you both talk with the family. Show a united front so the kids know they can't parent shop their way out of doing their part.
#2: Make it easy
We may think every member of our family is brilliant and can figure out any problem, right? Well, it's amazing to me how these brilliant minds become completely helpless when given a task if the steps aren't clear. "Well, you didn't tell me I had to actually use window cleaner on the bathroom mirror, you just told me to clean the mirrors" (and they used the dirty towel that just wiped down their countertop! Urgh!) For their sake and yours, make it easy. Everything has a place. If child of any age knows where the toys go back, it's easy to do that task. If there is no organization or assigned place for things, then there is confusion. Now, don't panic if you're house isn't setup with all the great cubbies, baskets, and bins online. Keep it simple. Example: Clothes are put in drawers or in the closet. They do NOT stay in the basket once they are laundered. Laundry baskets are also great to corral toys; and it's easy for a kid to put away toys in a large basket! It doesn't matter where things go as long as they have a designated spot. Don't overcomplicate. Creating a checklist of 50 tasks is overwhelming for anyone. Think of a few tasks to be done that give you the most "bang for the buck". Break tasks up in blocks of time during the day: Before School, After School and Before Bed. You can download checklist below to help you get started! Teach them how. Again, don't assume everyone just knows how to do things. Take the time to train them. Show them how, have them do it and then correct as needed.
#3: Make it fun!
You know your family. What will inspire them to help?
#4: Make it rewarding
Create a system of rewarding each person for good behavior. It doesn't have to be money, but it can be. A reward system is key to keeping the family motivated and on track to help around the house. Please don't overcomplicate this system (which I have done).
#5: Make it a habit
There is no end to 'helping around the house'. It is a constant need, a continous cycle. As you setup your chores and checklists for family, sort them into repeatable tasks that need to be done daily (like the checklist above), Weekly or Monthly tasks. As the habits form over a few weeks, you can adjust the prizes for the reward system for completing tasks without being told! 
To wrap up, the 5 tips are:
#1: Be honest #2: Make it easy #3: Make it fun #4: Make it rewarding #5: Make it a habit I'd love to hear your ideas for getting family to help more around the house! Leave a comment below to share!
You’ve set a goal for this year to get organized! You’ve decluttered a few key areas in your home! That’s great progress and definitely moving in the right direction!
But, are you starting to think, it’s one thing to GET organized, and another to STAY organized? Are you starting to worry if all the effort you are spending to GET organized is going to be a waste? How do you maintain a constant level of organized?? It’s actually pretty simple. Just 1 good habit. Once you develop this habit and consistenly apply it, you will keep clutter under control FOR GOOD! 
Ok, so one habit does sound easy, but habits are so hard!
Merriam-Webster definition of Habit as a usual way of behaving; something that a person does often in a regular and repeated way Habits are things we do without really thinking about them. They are routine and have become almost automatic in our subconcious mind. When a habit is formed, it helps us operate more efficiently and use less energy because we have trained our minds to just do the thing. As you set new goals for yourself, you need to take time and examine your habits to see if they are aligned with your goals. If habits align with goals, then you are SET! It’s just a matter of time to meet those goals. However, if you have habits that are not aligned with your goals, then you’ll feel like there are barriers you’re fighting against that make achieving the goal harder. Getting organized starts with first developing habits of getting rid of things you don’t need (or clutter), then stop bringing new things into your home that become clutter.
The ONE HABIT is: ALWAYS BE DECLUTTERING.
Consistently get rid of things you don’t use or need. Make this a daily practice; especially if you are still working through decluttering your home.
Your turn. So, let’s take a few minutes to really examine your current habits. Make a list of no more than 3 habits you do regularly that are NOT aligned with your goal of getting and staying organized. Download a free worksheet below to get started.
Shopping. Was that on your list? How about accepting things from others that you MIGHT use one day? Did that make the list? Both of these examples are habits that bring more clutter into the home and are are NOT aligned with your goal of getting and staying organized.
Now that we've identifed a few habits that need to be aligned, how do you CHANGE a habit?
Habits start with a trigger or cue. Something happens that automatically causes your mind to take action. To change a habit, you must identify the trigger that starts the reaction in your mind. Then, purposefully CHANGE the reaction to the trigger. As you continue to purposefully change the reaction to the trigger, a new habit will form.
For example, you shop because you want some “me” time, or just get out of the house! What is the true trigger? Are you bored, tired, or frustrated? Get below the surface and really identify the trigger here. Now, think of responses or actions other than shopping that are aligned with your goals.
Your turn! Look back to your list of habits. Take a few minutes to really dig deep to identify the triggers of the habits on your list. Then brainstorm a few options for response like the examples above.
From here, you put the new response into practice.
Keep track of yourself over the next few weeks. How many times did you experience the trigger or cue? Were you successful in changing the response? YES?? Then make a note of this success! You are one step closer to your goal!!
If you want faster adoption of the habit, then think of adding a negative consequence when old response happens. For my clients that are in heavy declutter mode; I ask them to adopt this rule in their home:
For every ONE item that comes in the house, TWO must go!
So, if you slip and buy that new top at the store, then TWO tops in your closet must go! this helps put a value on everything you bring in the home. Is that one new top worth losing two? Stay true to this rule by immediately placing 2 items in the Donate box the minute you get home.
I’d love to hear the ideas you brainstormed and how successful you have been at changing your response to trigger! Leave a comment!
“I have got to get organized!” Have you said this lately? Maybe even said it today? Well, you are not alone. I hear this often from friends, family, even myself! It may not make your top 3 New Year’s Resolutions, but I’m sure it crosses your mind frequently.
But what do we REALLY mean when we want to get organized?
Is it getting rid of some old stuff in your attic? Is it going thru and donating old clothes that don’t fit? Is it finally unloading those last 5 boxes you never unpacked when you moved years ago? Maybe. If you really ask yourself, what does “getting organized” really mean, I think you’ll find something deeper. Perhaps what you really feel is something like:
I’ll tell you friend, IT IS POSSIBLE!
You are not alone. Many families have been there. You would be surprised and relieved to know that just a little effort and motivation will get you and your family past the place you are now and on the path to peace in the home! For the next few weeks, I’ll be focusing on the heart of getting organized and provide solutions to kick-start this new year on a positive path.
The first step to getting organized is to GET RID OF CLUTTER.
I know you feel like you don't have time. But, do you have 5 minutes a day? The job of decluttering doesn’t have to take hours at a time. You can make slow and steady progress in just a few minutes a day. Here’s how.
But WHAT do you declutter?
As you go thru the room, grab items that are broken, damaged or expired, Put those items in the trash or recycle bags. For items that still work are not damaged but you don’t use or want them; put those in the donate bag. Make you goal to gather 20 items each day. At the end of 5 minutes, empty the bags into their containers for weekly pick-up. Note – GET FAMILY INVOLVED. Offer a dime or quarter per item the kids collect to give away!
Five minutes a day consistently every day will add up to a bigger declutter job. Slow & steady wins the race. Consistency builds habits. Developing a habit of daily decluttering is a great first step to getting organized and STAYING organized. You can do this!
I don’t know about you, but I cannot believe we are already one week into the new year! If you haven’t yet taken down your decorations, and need a little nudge to get you motived, KEEP READING because I have 3 great tips for storing Holiday Decorations that will save you TIME and MONEY!  Take a little time to declutter. It is worth it! I'm not talking a full blown purge session, but before you store your decorations, take a few minutes to assess what you have. - Minimize. The more you have, the more time it takes to put up and take down. Evaluate the joy the item gives to your family against the time needed. If it's not worth the time and energy, then let it go! - Trash items that are broken. Light strands, ornaments, inflatables. Do not continue to store thinking you'll fix one day. I've spent hours trying to get a broken light strand to work. It is not worth it! Trash and move on! - Donate items that are in good working order, but you have not used in last two years. Styles change. Don’t hang on to these things because you MAY want to use them again. Think about how happy someone less fortunate will be and how happy they would be to have that decoration that is sitting in a box in your basement. If the items you trashed need to be replaced next year, make a quick note in your calendar now for the month of October to purchase replacements. Making a note now while it's fresh on your mind will save you the trouble trying to remember in 10 months. Looking for directions and tips on what and how to declutter? Read here! Use standard storage totes There are so many tools, tricks out there. It is VERY easy to buy things because they are cute or appear to be functional. But you don't need them. Here are a few key items I do recommend using:
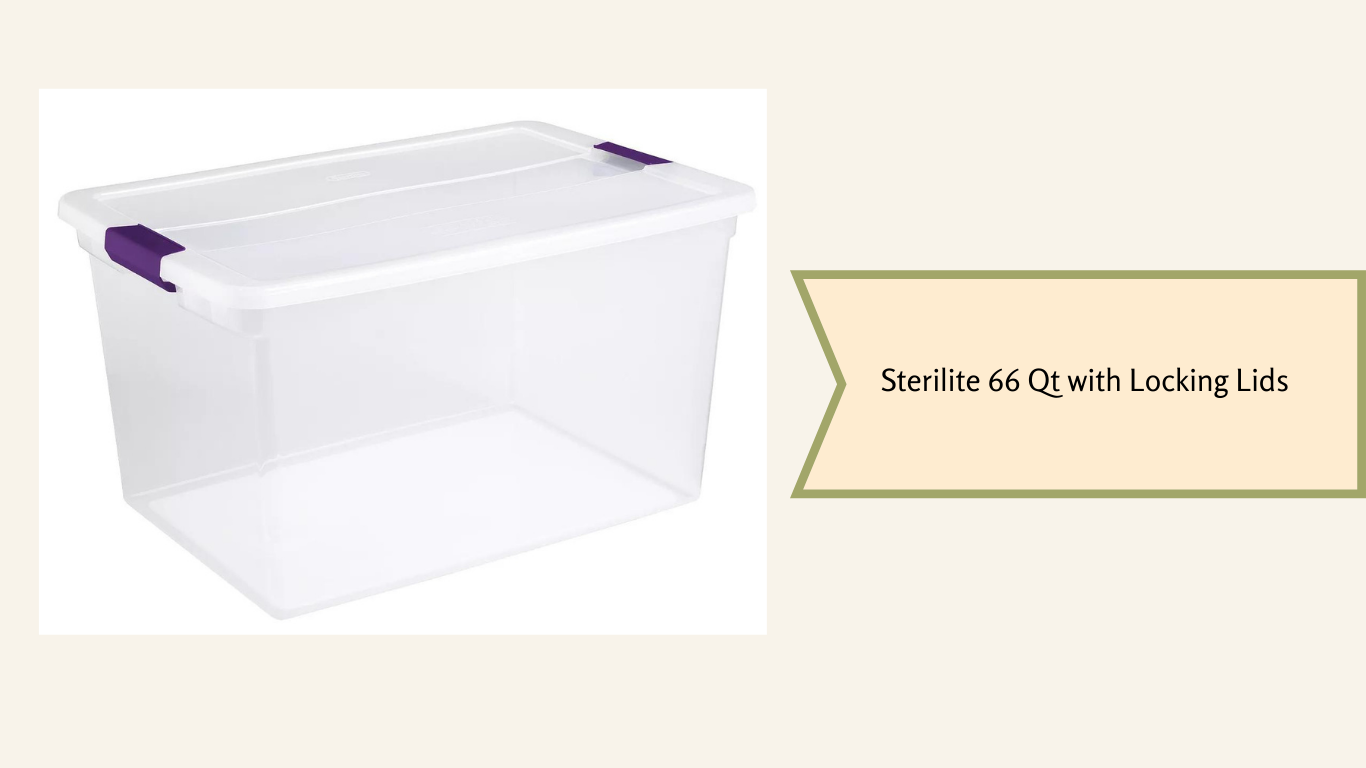 Limit Special Storage totes. You don't need them! Please, please do not go crazy buying every single gadget out there. It is quick and easy to replicate the inserts. With the standard 66 QT Sterilite along with some homemade inserts, you can easily manage the standard decorations, such as:
Store items logically placing like things together. If your box is for outside lights, store hooks or accessories needed for this purpose. A few other tips for storing boxes:
If you are looking for ways to maximize your storage space, read here! I hope this post has given you some ideas and motivation to do some light decluttering and get those decorations packed up using standard, low cost materials saving you time and money!!
Do you want to get organized but need movitvation or inspriation, contact us today! We would love to help you get started! I absolutely love that week between Christmas and New Year's Day. The crazy time preparing for the holiday has passed and you just spend time with family and friends relaxing and celebrating life. But you known what else? I also use this week to spend some good quality time focusing on my home. This week in particular, while the attic is empty of decorations, I have made it an annual habit to go through our attic and DECLUTTER! I tell you, the couple of hours I spend doing this each year makes such a difference. Something about clearing out the old and organizing this space gets me motivated, energized and gets my spirit ready for a productive year! So, you may be thinking, why in the world would I spend my time off organizing my attic? I don't enjoy doing that kind of stuff. I get it, I am kind of an oddball. But to help convince you to give it a try, here are some benefits of organizing.  Benefits of Organizing Storage SpacesSaves money. How many times have you purchased an item only to find that you already had 2 or more of them? That is super frustrating, right? Remember that scene from Christmas Vacation when Clark finds the gift in the attic he should have given out years ago? Don't be a Clark. Taking time to declutter and organize your things makes it easy to know what you have so you don't go out and buy more. In this way, being organized can save you money! Saves time and energy. Think for a moment about how much time you have spent today looking for things - your keys, your phone, your wallet or purse. These few minutes a day here and there really start to add up. When you organize a space or your entire home, everything has it's place. Building habits such as putting things back every day help keep your space organized. You will spend less time "looking for things" because you know where they are! More likely to get help from family. Now I've gotten your attention! Yes, it is true! The best way to get help from family is to make the task EASY. Having a designated place for everything and then teaching the family where things go makes it easy for them to help. Are you starting to see how just starting to get organized can get you motivated and energized? Great! Maximizing SpaceLet's get back to topic of decluttering storage spaces before all those Holiday decorations go back. Take a few minutes to examine your storage space. As you do, think about ways to maximize the space to make it more functional in these 3 ways: The Floor. We'll start from the ground up! If your storage space is an attic, then you likely have some flooring in your attic, but not a lot. You can add plywood flooring to ceiling to increase floor space for storage. A few quick notes & a disclaimer.
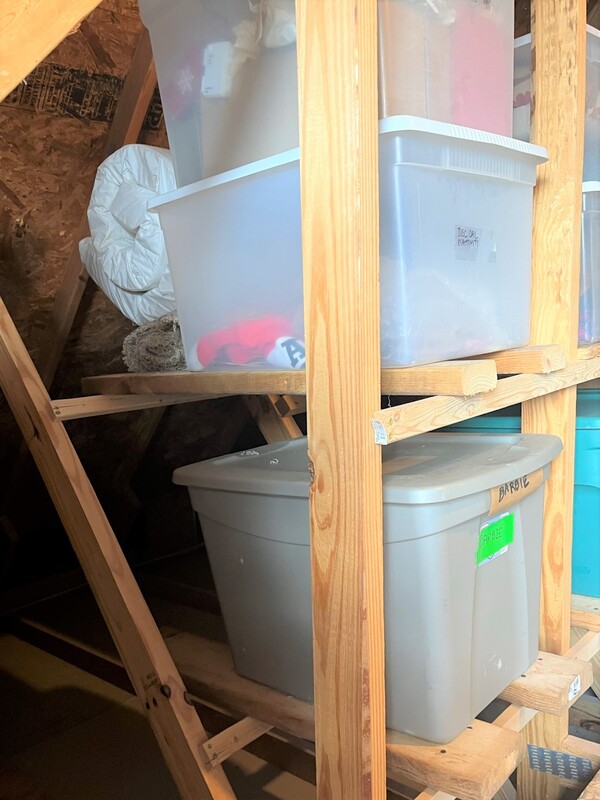
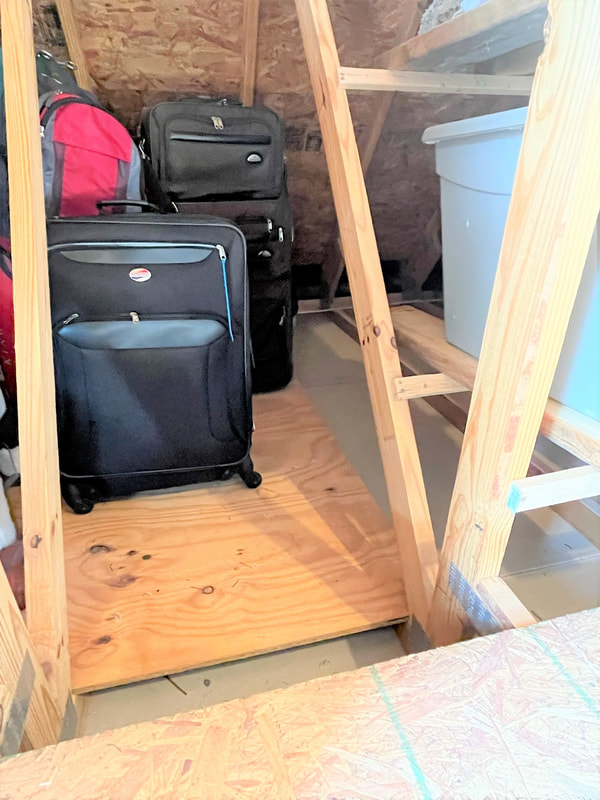 Go Vertical. Instead of just stacking items, consider these two ideas:
Overhead. Store items that are large, but lightweight overhead. We store our folding tables and some large clothing boxes with clothes overhead. For garage spaces, there are systems that suspend from the ceiling or you can increase height of wall shelves to take advantage of the wall space available. Get creative, but be safe. Note on lighting. It is worth it to have accessible lighting in storage spaces so you can see well and be safe. Consider adding a light fixture or use brighter bulbs. Also, make sure switch or pull string is close to entrance of space 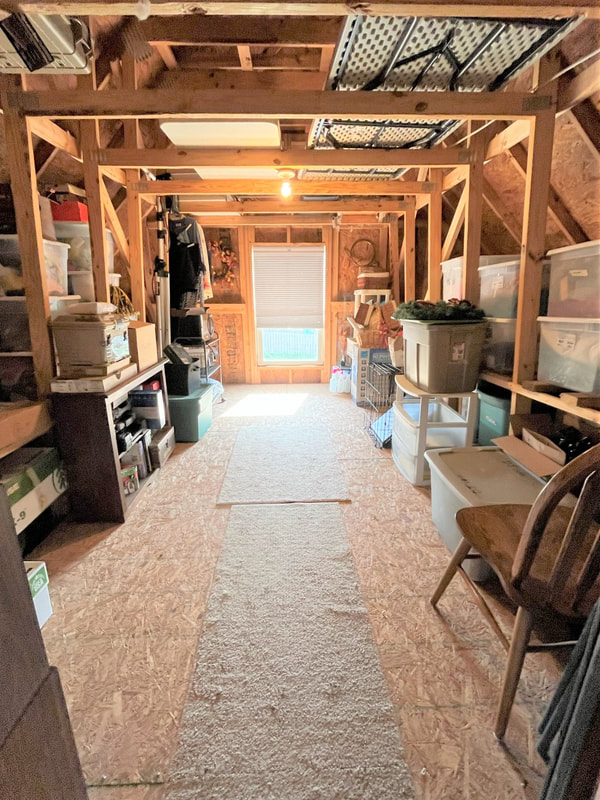 I hope this post has provided you with some ideas to inpire you to spend a little time to focus on maximizing and organzing your own storage areas. You will reap the benefit of this effort by saving money, energy, and time in the future AND making it easy for your family to help put things away where they belong! Come back for more ideas on declutting, getting organized and STAYING organized!
If you're wanting to get organized but need more inspiration or motivation, contact us today! We would love to help you get started!
Is your first step when starting an organizing project is buying new containers, bins, or hangers? Do you think organizing is moving things from one box to another, bigger container? If so, then, you’re making the biggest and most common mistake in organizing.
You may not be disorganized; you may just have too much stuff!
To organize your space the right way, your first step should be to PURGE or Declutter items you no longer use. Don't spend time Organizing clutter! 
How to Purge (or declutter)
DECIDE one area of your home to focus for this session. If the area feels overwhelming, start small. Pick 1 drawer, 1 shelf, or even 1 pile.
PREPARE. Once you’ve decided on your space, you need to spend a few minutes preparing for the PURGE.
START. This is likely the hardest step.
Don’t over think or talk yourself out of starting.
TAKE A BREAK. After 20 minutes, set timer for 5 minutes and take a break, but stay in the space.
Look at what you accomplished! Do you feel an emotional weight has lifted? Glance at amount of items in each pile. If there are no items in trash or donate, revisit the KEEP pile.
WRAP UP. Take next 5 minutes to do the following:
If Trash or Recycling containers are full, take outside. Move donation items to your car.
REPEAT. Keep repeating steps above in 30 minute intervals until you stop for the day or finish going thru the space.
|

|
New Day Organizing is a professional organizing company located in High Point, NC and serves the Piedmont Triad Area.
|

|

|
@2024 All Rights Reserved